The following document describes how to save and restore all parameters (global parameters and product settings) from a SHARK 2 unit using the SHARKNET 2 software. This feature is available in SHARKNET 2 since version V1.0.1.29 and requires a SHARK 2 software version V1.16x or higher.
The complete parameter settings of a unit can be saved in a file on the PC running the SHARKNET 2 software. This file can later be used to restore the parameter settings of the SHARK 2 unit to its previous values.
Saving the settings configuration:
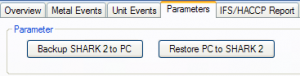
1.) Select the SHARK 2 unit for which the settings configuration is to be saved and then select the ‘Parameters’ tab page. The following screen will appear:

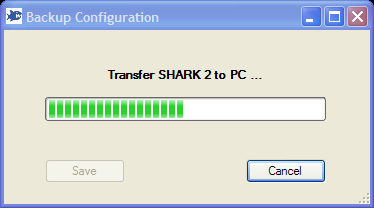
2.) Click on the button labelled ‘Backup SHARK 2 to PC’:

3.) The following dialog will open and display the progress while the settings configuration is transferred from the unit (takes approximately 10 seconds to complete):
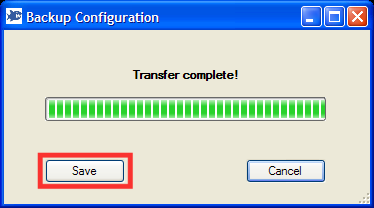
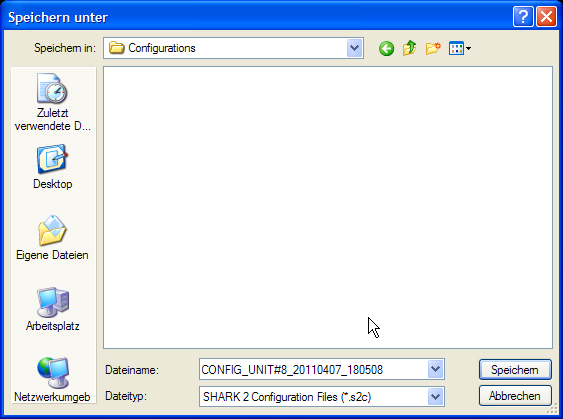
4.) Press the Save button to store the settings to a configuration backup file. The SHARKNET 2 software will automatically generate a default name based on the SHARKNET UNIT# and the current date and time. The SHARK 2 configuration files use a special extension of *.s2c.
Restoring the settings configuration:
1.) Select the SHARK 2 unit for which the settings configuration is to be restored and then select the ‘Parameters’ tab page. The following screen will appear:

2.) Click on the button labelled ‘Restore PC to SHARK 2’:

3.) The following warning dialog will come up to indicate that restoring a saved configuration is a critical operation, since the current settings at the unit are overwritten by the older settings from the backup:
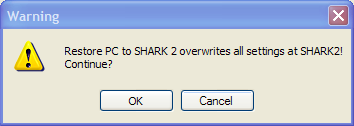
4.) If indeed an old backup is to be used to overwrite the current settings, press ‘OK’ otherwise press ‘Cancel’.
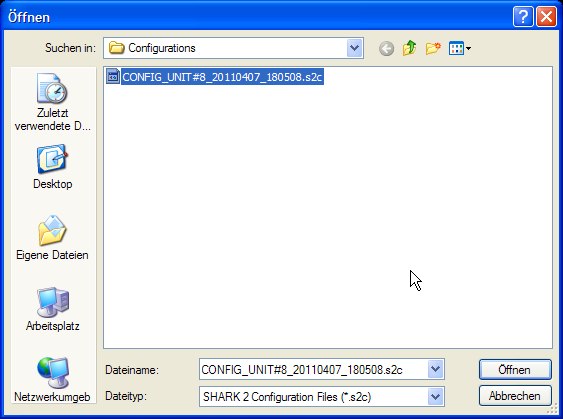
5.) After pressing ‘OK’ a file open dialog will be shown that allows the selection of a saved configuration. Select the configuration file (*.s2c) that should be used to restore the settings configuration and click the ‘Open’ button.
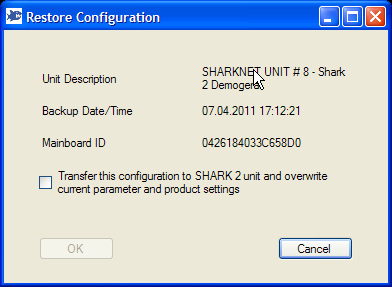
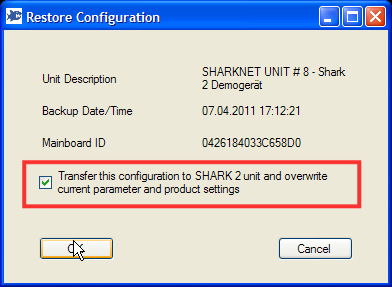
6.) The following dialog will open up to display the information contained in that configuration file (namely the unit description, the date and time of the backup and an identification number unique for each main board):
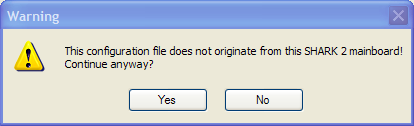
7.) If the selected configuration file is not from the same SHARK 2 unit, another warning message is shown. You should only continue here, if the main board of this unit was just changed and the settings are to be restored. In all other cases you should not continue pressing ‘No’.
8.) To continue with the transfer of the selected configuration to the SHARK 2 unit the check box needs to be checked to enable the ‘OK’ button. Then press the ‘OK’ button.
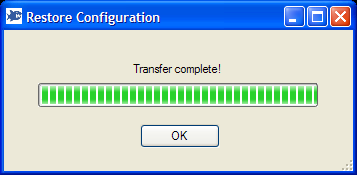
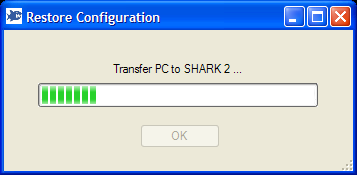
9.) After the pressing the ‘OK’ button the configuration will be sent to the SHARK 2 unit. The progress is indicated by the following dialog and will take approximately 15-20 seconds:
10.) When the transfer is completed the SHARK 2 unit will automatically perform a reboot and start with the restored settings.