
Handling of the product menu to add new products
Start in the mainscreen.
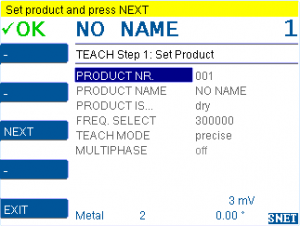
Start teach assistant
Press TEACH to start the teach assistant.
Use ⯅⯆ to navigate through the menu.
Choose PRODUCT NR.
Go to PRODUCT NR.
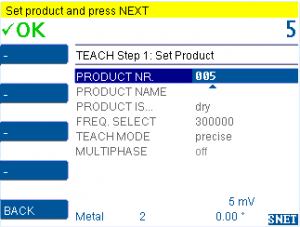
Press +/- to choose the desired product number.
Confirm with OK.
Note: Product 0 is set to neutral and can not be edited.
Choose PRODUCT NAME
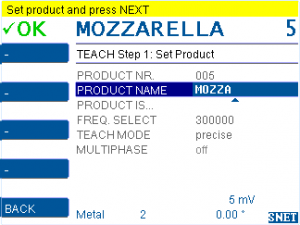
Go to PRODUCT NAME
Press OK to edit it.
PRESS +/- to change the current letter.
Press ⯅⯆ to select the previous/next letter.
Note: Only latin characters available.
Confirm with OK.
Choose product characteristics
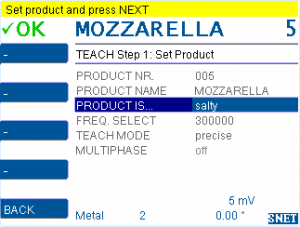
Go to PRODUCT IS…
Press OK.
Press +/- to choose the characteristic that describes your product.
For further information upon product characteristics refer to:
https://docs.cassel-inspection.com/md/product-menu
Confirm with OK.
Select frequency
Note: Only technicians should edit this setting.
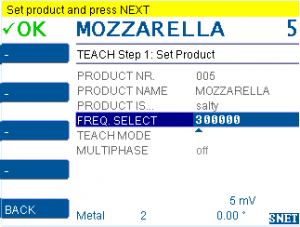
Press OK.
Press +/- to select the desired frequency.
Confirm with OK.
Single-frequency-sensor:
This setting cannot be edited.
Multi-frequency-sensor:
PRODUCT MENU > TEACH SETUP > AUTO FREQUENCY set to yes: FREQ.SELECT is set automatically and cannot be edited.
Multi-frequency-sensor:
PRODUCT MENU > TEACH SETUP > AUTO FREQUENCY set to no: FREQ.SELECT can be edited.
Select TEACH MODE
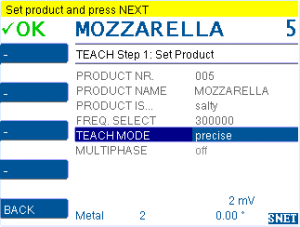
Go to TEACH MODE.
Press OK.
Press +/- to select teach mode
For further information upon teach modes refer to:
https://docs.cassel-inspection.com/md/product-menu
scroll to TEACH MODE section.
Teach product
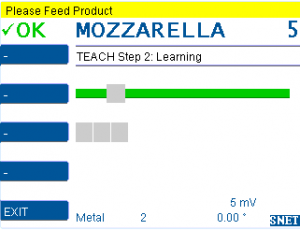
Check the product settings before starting the teach process.
Follow the instructions in the yellow notification bar and feed the product samples through the sensor. The quantity of products for teach process depend on the choosen teach mode.
Teach complete
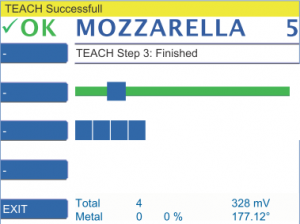
The yellow notification bar tells when the teach process is completed.
The product is added to the product list and the metal detector is setup for the product characteristics.
Comments 1
Comments are closed.